Ora Time and Expense Webcam Setup
Created Tuesday, October 30, 2007 - Updated Saturday, August 15, 2020
If you are not getting an image from your webcam, try the following:
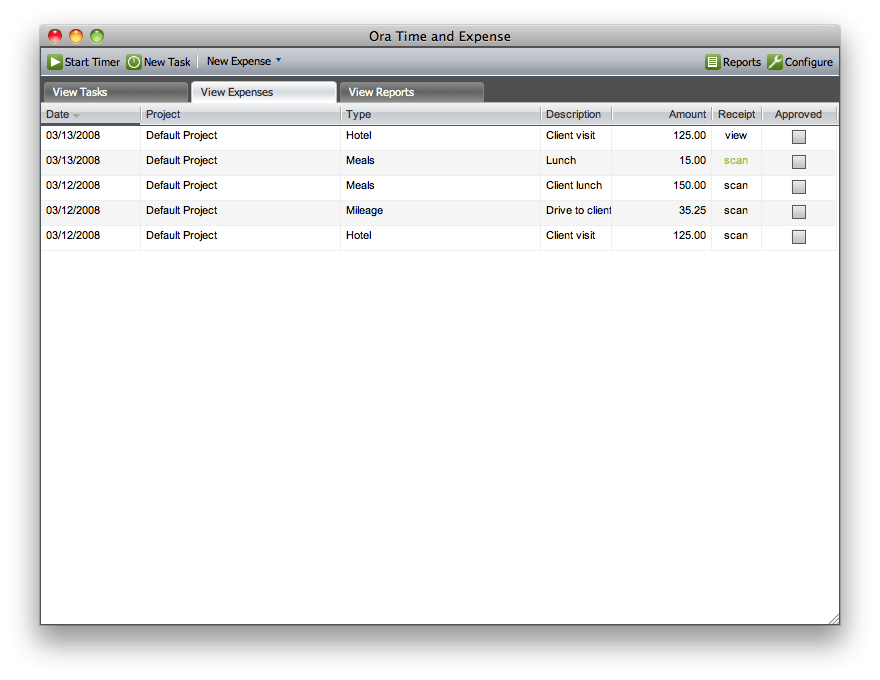
- Go to the Expense grid and click the “scan” link of a expense.
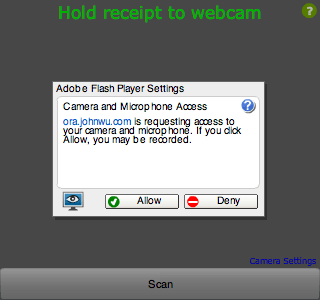
- Select Allow and check Remember to give Ora access to the webcam.
- Click “Camera Settings” in the lower right to bring up Flash Player Settings.
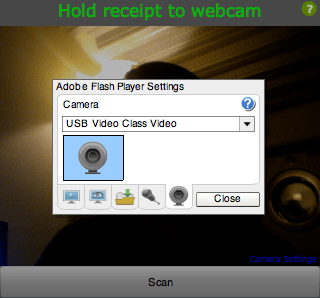
- Select the Camera tab and change the Camera type. For Macs, set the Camera to USB Video Class Video.
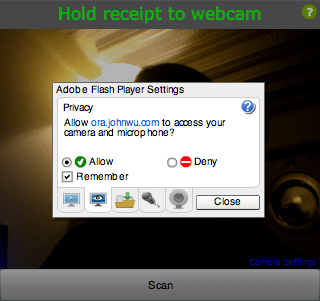
- In Privacy tab of Camera Settings, set allow “ora.johnwu.com” access to webcam with Remember checked, so you won’t be prompted to allow the Flash Player to access the webcam each time.
- When you are done, click the Close button, you should see video from Camera on the screen.
Related